With the holidays on the way, Mike and I were thrilled earlier this
month to receive materials from AirStone to help us make over our
fireplace. Those samples (Spring Creek bricks and adhesive) were
provided to us free of charge, but the opinions and information in this
post are entirely our own. You can find more information on this
product at airstone.com, including installation tips and videos.


Prior to this project our fireplace was surrounded by beige tile, the same tile that is in our foyer, powder room, and kitchen. I am not a huge fan of this tile on the floor and was even less in love with it on our family room wall. For a source of warmth and comfort, this fireplace had a cold and uninviting appearance.

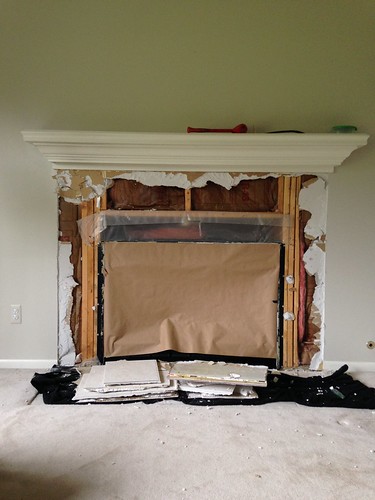
Therefore, we were not terribly heartbroken to tear the tile out using a crowbar and a mallet. I was not lying when I told Mike I preferred the demo look to the tile.
After cleaning up the edges...

..and hanging new backer board...

...the mudding and sanding portion of the project began. This part took the longest, mostly waiting for layers to dry.

From demo to this point, the project spanned a week but only required a couple of hours of actual labor.
The AirStone bricks were packaged in their boxes in shrink wrapped smaller packs. After arranging like brick packs together to see how much of each variety we had to play with, we got to work on the giant puzzle.

The object of this game is to arrange the bricks so the various colors and sizes are pleasantly dispersed and joints are staggered as much as possible. Bricks can be cut using a hacksaw but should only be cut vertically. Essentially I created our fireplace surround on our family room floor, stepped back and replaced and shifted bricks as necessary (the bricks in the middle were for that purpose), and Mike knew that bricks popping out past the virtual edges of our fireplace needed to be cut. A handful of the bricks were chipped on the edges, but we had no problem working those into the project without wasting materials or compromising the arrangement.

Mike was pretty pleased with his sawing set-up. He placed a milk crate upside down on an old blanket and used the lines on the crate to help him keep the cuts square. The dust fell primarily through the crate onto the blanket.

Cutting, applying the adhesive, and sticking the bricks to the wall took about four hours total. We enlisted a couple of four-year-old helpers for the last two pieces.


The whole project was incredibly DIY-friendly. The time, energy, and skill involved were all minimal, and the result is just what we envisioned.


This warmer, more updated look made me quite eager to decorate for the holidays. Our kids have joked that Santa might get confused at first when he sees how much better our fireplace looks this year! I envision him eating his cookies and enjoying the view.
Here's one last before and after for you:

(We painted the brass on the fireplace doors some months ago. We are now considering gel staining the handles a darker color to complete the update.)
If you care to see this fireplace dressed up for its first Christmas, you can see it here:

Wow! It looks wonderful! Congrats on the recent sponsors!
ReplyDeleteThanks, Katie!
DeleteYour fireplace is beautiful!
ReplyDeleteThank you, Jennifer!
DeleteHi Carrie, absurdly love your fireplace - I am inspired to do mine! Did you use the natural edge around the opening or were you able to use the regular straight edge and it look ok ?
ReplyDeleteHi Suzi,
DeleteWe used the flat edge, but looking back I think I would prefer the natural edge. Since it is flat against a wall that nobody can walk past, it's fine, but if you have an edge that is at all visible, I would go for natural. I hope that helps!
Thank you! Just saw my typo - I meant absolutely not absurdly but I guess that works too! :-)
DeleteWhy are they called Air Stone? Is there something different from these and other faux stones?
ReplyDeleteAmber, these stones are extremely lightweight. I don't recall now how they are made (their website did explain, I believe), but I imagine that is the inspiration for the name.
DeleteHi Carrie, great job! We have a similar 'tiled' type of fireplace. Would it have been possible to just place the Airstone directly over the tiles, or was ripping them out and hanging backer board first necessary because of the weight? Thanks!
ReplyDeleteJon, check the AirStone website to be sure, but I think you could do that.
DeleteCan this be used on an existing brick fireplace?
ReplyDelete