On Pinterest a while back I was intrigued by this
Better Homes and Gardens tip
of turning regular glassware into faux mercury glass by spritzing it
with water and spray painting with Krylon Looking Glass spray paint. I
filed that idea away (and repinned it).
We've
been in need of new living room lamps since the kids became mobile.
Both of the table lamps on either end of our couch have taken nosedives
and chipped. I'm kind of a thrift store junky and have had my eye out
for some that could be given a new life with spray paint for this
purpose. There was a set I kind of liked, enough to go back a week or
so later, but they got away.
Supplies and Rough Price Breakdown:
Two used clear glass lamps $25
Two drum lamp shades $26
Krylon Looking Glass paint $8 ($12 with a coupon)
Burlap $5
3M spray adhesive (already had)
Black spray paint for the bases $5
= roughly $35 per lamp
Mike and I recently popped into a Salvation Army store (in the spare time between finishing dinner and our movie time on our anniversary date night--aren't we fancy?), and I spotted a pair of these:
Ok, so you have already seen them sitting in my living room, so obviously I bought them, but I didn't that day. They were marked $19.99 each, and knowing I can get lamps at Home Goods for 29.99 each (I'd already been hunting), it didn't make sense to spend forty for the pair. Add in $30 for two new shades, and I wouldn't have even broken even. I thought of talking to a manager, but we had a movie to get to, so I decided to think on it.
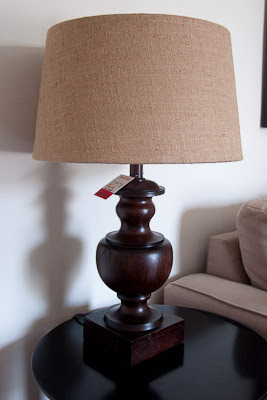
Back to Home Goods I went later that week. I bought two of these:
and we lived with them with the tags (the red one is because my mom pointed out a ding in the shade and got me 10% off). I still love the wood bases and the burlap drum shades, but with our black end tables and dark wood floor, it was all just too dark. I saw that what we needed was a little sparkle.
Having seen some mercury glass lamps at Home Goods for $40 each, and knowing that
Pottery Barn sells them for $260 each, I once again planned to return to Salvation Army for a pair of lamps I should have just bought in the first place.
Luckily, they were still there. I tracked down a manager and asked for a better price on the lamps. With $25 for the pair as my goal, the manager took a look at the tags and told me she could do $24.99 for the set. What a sucker. I would have given her another penny. : )
I then bought two lampshades for $12.99 each and a can of the wrong spray paint (I'll explain) at a little hardware store.
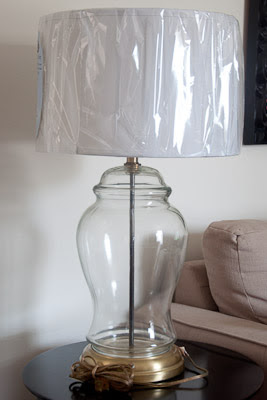
Above is what I had at that point, two clear glass lamps with brass bases and plain white drum shades. I actually enjoyed this look for a little while and considered scrapping the mercury glass look for a day or so. I would have just gone for another color for the base and the pole inside. I hadn't returned the wooden lamps yet and tried out their shades with the glass ones.
Yup. I liked it.
Looking back at the Better Homes and Gardens tip, I saw that the paint had to be Krylon Looking Glass paint. I had bought the only silvery metallic paint that the little hardware store I popped into had--Rustoleum Chrome. I Googled again to see if it mattered, and luckly Anna @
Take the Side Street, informed me that it did. Following her advice I printed up a 40% off coupon for Hobby Lobby, and hit the road as soon as Mike got home from work.
According to wisegeek.com, mercury glass is "clear glass which is mold-blown into double-walled shapes. The glass is then coated on the inside with a liquid silver nitrate solution." Although
West Elm, Home Goods, and various faux finishing tutorials seem to be all about the antiquing splotches, I felt I didn't have to go all overboard with that part of the look, that spraying the paint on the inside of the glass is really the key.
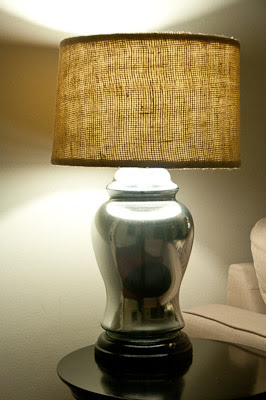
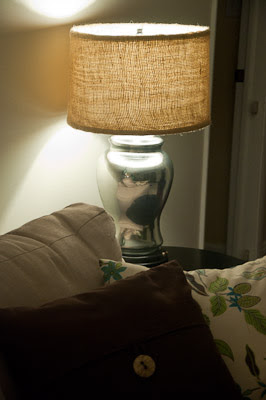
I practiced my technique on an old vase and then followed the Better Homes and Garden tip by spritzing the inside of the lamps with water (after totally disassembling, of course) and spraying light coats of the Krylon Looking Glass paint. I repeated that process a few times, letting the paint and water dry in between coats (about an hour).
I didn't go crazy with the water, and the splotches are really only noticable up close. Perhaps I should have left more spaces totally clear? Maybe I'll go back in and dab it with some vinegar later on...
Watching the paint dry actually
was amusing. That Looking Glass stuff really looks like it's turning to silver, unlike other spray paint that looks like, well, spray paint.
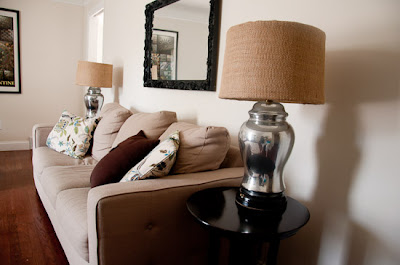 |
| Day |
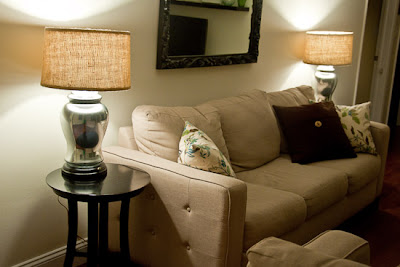 |
| Night |
I covered the lampshades with burlap from Home Depot (something like $5 for an enormous roll). To do so I rolled out the burlap, measured by rolling a lampshade down it twice since I wanted two layers, and cut that length. The width of the fabric was well over double the height of the shades, so I folded the burlap in half and cut it into two strips, one for each shade. I sprayed each shade with 3M spray adhesive and rolled it onto the burlap, smoothing out any bubbles or folds. I trimmed the burlap to about an inch past the edges of the shade and used a glue gun on the inside. Later I plan to add some white electrical tape to make it look a little nicer in there--I did my best, but it
is burlap. Sorry I didn't take pictures of that process. There's only so much time to get this kind of thing done during naptime!
Now, these are obviously breakable, but the lamps we had before were tall and skinny. I'm confident these will be more stable than the previous ones and should survive. The kids aren't nearly as destructive as they were when they were cruising along furniture and learning to walk!
I enjoyed working with the Krylon Looking Glass paint and the burlap and suspect my fall and Christmas decorating will incorporate a little of both.
Like Anna @
Take the Side Street, I did not receive anything for promoting Krylon's paint but would not object a free can or two if anyone with that power stumbles onto this blog. ; )
It's been a bit of a craftapalooza around here with all the kitchen projects (stay tuned), but I started and finished these Kryol Lookin Glass mercury glass lamps in time to share it with Katie @
Walks Like Rain for her delayed Pinterest Challenge tomorrow. She was inspired by the Pinterest Challenge hosted by
Young House Love and
Bower Power that ended last Tuesday. (I saw they're still accepting links, so I think I'll share this with YHL as well!)


