Monday, September 3, 2012

Our Reality Kitchen - Gel Stain Cabinets

Gel Stain Cabinets


Like the unofficial summer, our kitchen facelift project lasted roughly from Memorial Day until Labor Day this year.  Part of preparing for my dad's party last weekend included wrapping up this adventure.

If you would like some background on this project, you can find out more in previous posts.


Gel Stain Cabinets

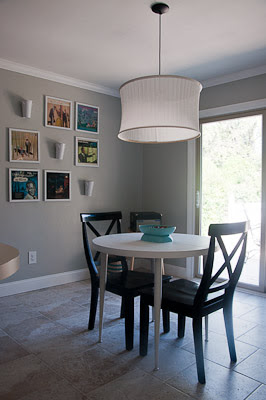
The table was my grandparents' kitchen table for decades, and while the sentimentality and vintage look are ideal, our chairs don't fit beneath it.  On the sides pictured without chairs, the legs are too close together for our chairs to go between them, a bit of information we discovered after bringing it home from my parents' house and after Mike painted it. The table does have two leaves, but it opens in the other direction.  It will do for now, but I'll be keeping my eyes open for a larger pedestal table, an option I considered before settling on using this one anyway.

Gel Stain Cabinets


Gel Stain Cabinets

Gel Stain Cabinets

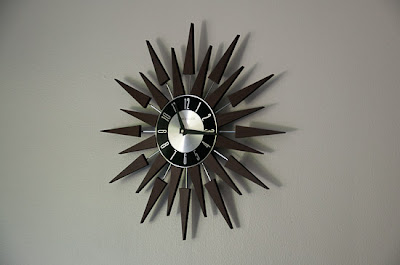
This is the clock from Home Goods that I mentioned before.  With the color of the wood, the black details, and the mid-century modern look complete with that typeface I adore, I don't regret the $40 splurge at all.

Gel Stain Cabinets

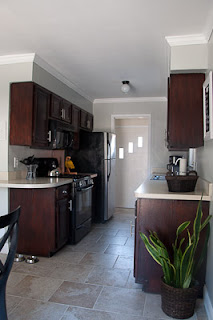
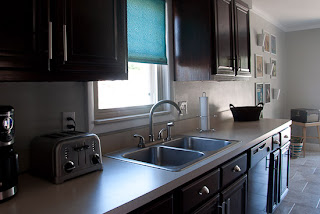
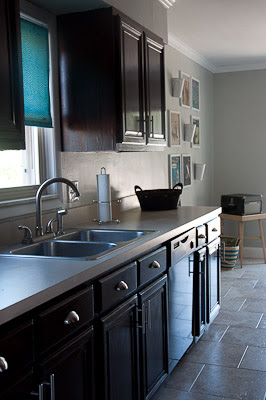
Mike darkened the cabinets with General Finishes Gel Stain in Java.  The change might not be an obvious one to some, but it's a very satisfying improvement to us.  I think it helps blend our black appliances in while the new cabinet and drawer pulls highight the stainless steel we do have.


Here are a couple of before photos for comparison's sake:

Gel Stain CabinetsGel Stain Cabinets

After:

Gel Stain CabinetsGel Stain Cabinets


Gel Stain Cabinets

Gel Stain Cabinets

The window shade is a Target tablecloth I found on a clearance rack ($9) that I glued to a roller shade ($8) with spray adhesive.  I saw the idea on Pinterest but didn't really follow any instructions.  I just cut the cloth, sprayed it with 3M spray adhesive, and rolled it back up.  Maybe I should dig out that pin for more advice because it doesn't work great.  I think it might be too heavy for the cheapo roller as it needs to be taken down and manually rolled up sometimes.  Still, it serves its purpose.  It keeps the afternoon sun out of my eyes when cooking and adds some color.  I don't fuss with it much anyway.

Gel Stain Cabinets

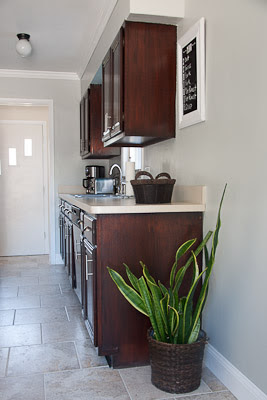
You can see the cabinet color is still on the reddish side in the light.


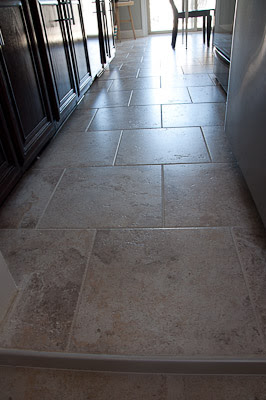
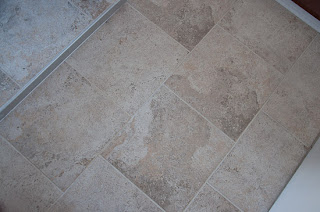
In addition to tiling the floor, staining the cabinets, and painting the walls, Mike installed all new floor and crown molding.  The previous owners' work was not of the best quality, and it had been bugging Mike for years.

More floor details:

Gel Stain Cabinets


Gel Stain Cabinets

This kitchen isn't our dream kitchen, but for our reality kitchen, I think it's pretty darn nice.
 Now, what to do this fall....


Friday, July 20, 2012

Cabinet Door Menu Board

Inspired by The Naptime Decorator and The Real Housewives of Idaho's menu boards, I repurposed our extra cabinet door into a chalkboard for our weekly meal planning.

Cabinet Door Menu Board

Mike and I have planned our weekly menus for years to help us make our grocery lists and have done so on paper like you see in the photo below.  We plan with lunches in mind to use leftovers as much as possible, which has gotten a little more complicated with a couple more mouths to feed.  : )  We'll still discuss the lunch aspect of our menu plan, but the board will only show the meals that we're actually making (or not making in the case of carry-out, parties, and so on) for dinner. 

Cabinet Door Menu Board

Mike removed this cabinet door when we first moved in to make room for our dishwasher (the house didn't have one).  You might recall that we used this door to see how many coats of gel stain we would want on our cabinets. 

Cabinet Door Menu Board


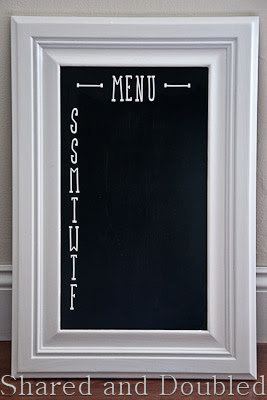
I sanded (especially the gel stain lines) and then spray painted the "frame" of the door.  I intended to apply chalkboard vinyl to the inside, but unfortunately the vinyl I had on hand wasn't quite big enough.  Instead I used a Michael's 40% off coupon on some Martha Stewart chalkboard paint.  (In the future I might try  Naptime Decorator's tip of mixing one part paint with two parts of Plaster of Paris to make my own.  She uses it for all furniture makeovers, she likes it so much. You have to apply a wipe-off wax afterwards for regular furniture.)

Cabinet Door Menu Board


I'm not sure why I bothered with the painter's tape.  It usually just irritates me, and this time was no exception.  I'm sure I could do more to prevent the bleeding and peeling of paint, but I think I should just be careful with the edges to begin with.  I'll have to touch up a little either way.


The letters are Thickers that I found at Hobby Lobby.  They reminded me of the long, skinny letters on a local elementary school (very mid-century) with the addition of some clunky serifs.  I've fantasized about stealing some letters off the school to make a sign with my own name.  Yes, I do lust after a typeface.

Cabinet Door Menu Board

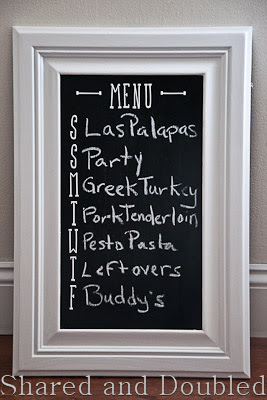
Here's the cabinet door menu board adorned with the glorious handwriting that 10+ years as a teacher has produced.  Yep, it looks the same as it did in third grade.  Hopefully it's endearing to my poor students.  :P  While we wrap up the kitchen fix-up, you can see our menus tend to be pretty carry-out heavy.  Mmm, Buddy's tonight!


Monday, July 16, 2012

DIY Mercury Glass Lamps

Krylon Looking Glass Mercury Glass Lamp
On Pinterest a while back I was intrigued by this Better Homes and Gardens tip of turning regular glassware into faux mercury glass by spritzing it with water and spray painting with Krylon Looking Glass spray paint.  I filed that idea away (and repinned it).

We've been in need of new living room lamps since the kids became mobile.  Both of the table lamps on either end of our couch have taken nosedives and chipped.  I'm kind of a thrift store junky and have had my eye out for some that could be given a new life with spray paint for this purpose.  There was a set I kind of liked, enough to go back a week or so later, but they got away.
Supplies and Rough Price Breakdown:

Two used clear glass lamps $25
Two drum lamp shades $26
Krylon Looking Glass paint $8 ($12 with a coupon)
Burlap $5
3M spray adhesive (already had)
Black spray paint for the bases $5
= roughly $35 per lamp


Mike and I recently popped into a Salvation Army store (in the spare time between finishing dinner and our movie time on our anniversary date night--aren't we fancy?), and I spotted a pair of these:

Krylon Looking Glass Mercury Glass Lamp


Ok, so you have already seen them sitting in my living room, so obviously I bought them, but I didn't that day.  They were marked $19.99 each, and knowing I can get lamps at Home Goods for 29.99 each (I'd already been hunting), it didn't make sense to spend forty for the pair.  Add in $30 for two new shades, and I wouldn't have even broken even.  I thought of talking to a manager, but we had a movie to get to, so I decided to think on it.


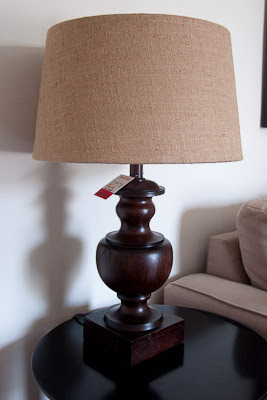
Back to Home Goods I went later that week.  I bought two of these:
Krylon Looking Glass Mercury Glass Lamp

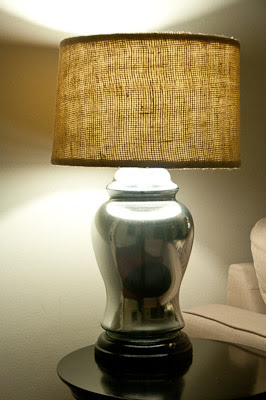
and we lived with them with the tags (the red one is because my mom pointed out a ding in the shade and got me 10% off).  I still love the wood bases and the burlap drum shades, but with our black end tables and dark wood floor, it was all just too dark.  I saw that what we needed was a little sparkle. 

Having seen some mercury glass lamps at Home Goods for $40 each, and knowing that Pottery Barn sells them for $260 each, I once again planned to return to Salvation Army for a pair of lamps I should have just bought in the first place. 

Luckily, they were still there.  I tracked down a manager and asked for a better price on the lamps. With $25 for the pair as my goal, the manager took a look at the tags and told me she could do $24.99 for the set.  What a sucker.  I would have given her another penny.  : )

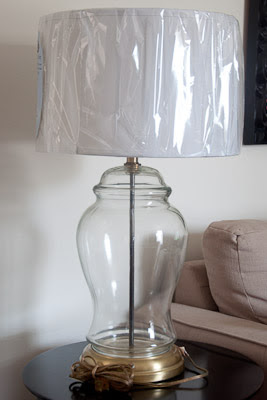
I then bought two lampshades for $12.99 each and a can of the wrong spray paint (I'll explain) at a little hardware store.

Krylon Looking Glass Mercury Glass Lamp
Above is what I had at that point, two clear glass lamps with brass bases and plain white drum shades.  I actually enjoyed this look for a little while and considered scrapping the mercury glass look for a day or so.  I would have just gone for another color for the base and the pole inside.  I hadn't returned the wooden lamps yet and tried out their shades with the glass ones.

Krylon Looking Glass Mercury Glass Lamp

Yup.  I liked it.

Looking back at the Better Homes and Gardens tip, I saw that the paint had to be Krylon Looking Glass paint.  I had bought the only silvery metallic paint that the little hardware store I popped into had--Rustoleum Chrome.  I Googled again to see if it mattered, and luckly Anna @ Take the Side Street, informed me that it did.  Following her advice I printed up a 40% off coupon for Hobby Lobby, and hit the road as soon as Mike got home from work. 

According to wisegeek.com, mercury glass is "clear glass which is mold-blown into double-walled shapes. The glass is then coated on the inside with a liquid silver nitrate solution." Although West Elm, Home Goods, and various faux finishing tutorials seem to be all about the antiquing splotches, I felt I didn't have to go all overboard with that part of the look, that spraying the paint on the inside of the glass is really the key. 

I practiced my technique on an old vase and then followed the Better Homes and Garden tip by spritzing the inside of the lamps with water (after totally disassembling, of course) and spraying light coats of the Krylon Looking Glass paint.  I repeated that process a few times, letting the paint and water dry in between coats (about an hour).

Krylon Looking Glass Mercury Glass Lamp


I didn't go crazy with the water, and the splotches are really only noticable up close.  Perhaps I should have left more spaces totally clear?  Maybe I'll go back in and dab it with some vinegar later on...

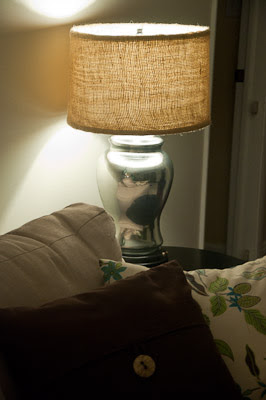
Watching the paint dry actually was amusing.  That Looking Glass stuff really looks like it's turning to silver, unlike other spray paint that looks like, well, spray paint.
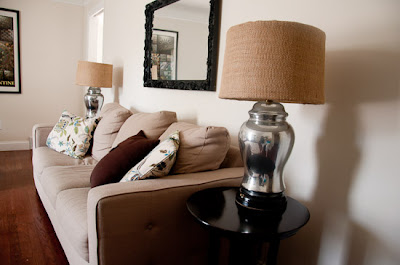
Krylon Looking Glass Mercury Glass Lamp
Day
Krylon Looking Glass Mercury Glass Lamp
Night


I covered the lampshades with burlap from Home Depot (something like $5 for an enormous roll).  To do so I rolled out the burlap, measured by rolling a lampshade down it twice since I wanted two layers, and cut that length.  The width of the fabric was well over double the height of the shades, so I folded the burlap in half and cut it into two strips, one for each shade.   I sprayed each shade with 3M spray adhesive and rolled it onto the burlap, smoothing out any bubbles or folds.  I trimmed the burlap to about an inch past the edges of the shade and used a glue gun on the inside.  Later I plan to add some white electrical tape to make it look a little nicer in there--I did my best, but it is burlap.  Sorry I didn't take pictures of that process.  There's only so much time to get this kind of thing done during naptime!

Krylon Looking Glass Mercury Glass Lamp

Now, these are obviously breakable, but the lamps we had before were tall and skinny.  I'm confident these will be more stable than the previous ones and should survive.  The kids aren't nearly as destructive as they were when they were cruising along furniture and learning to walk!

I enjoyed working with the Krylon Looking Glass paint and the burlap and suspect my fall and Christmas decorating will incorporate a little of both.

Like Anna @ Take the Side Street, I did not receive anything for promoting Krylon's paint but would not object a free can or two if anyone with that power stumbles onto this blog.  ; )

It's been a bit of a craftapalooza around here with all the kitchen projects (stay tuned), but I started and finished these Kryol Lookin Glass mercury glass lamps in time to share it with Katie @ Walks Like Rain for her delayed Pinterest Challenge tomorrow.  She was inspired by the Pinterest Challenge hosted by Young House Love and Bower Power that ended last Tuesday.  (I saw they're still accepting links, so I think I'll share this with YHL as well!)  

Wednesday, May 2, 2012

Convert an Old Night Stand into a Play Kitchen

 As Michael and Sophie would say...

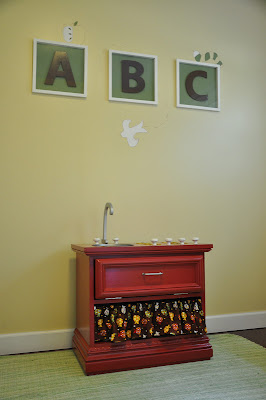
Ta-da! Mike and I finished the little nightstand-turned-kitchen in time for the kids' 2nd birthday celebration. Just barely, but we did.

Nightstand Play Kitchen

I love how much I use the pronoun "I" in the first post I wrote  about this project.  At that point I had done the shopping, planning, and general obsessing necessary for this kind of work. 

Later, I transformed the four wooden sunshines into burners by painting their middles silver.  I also sewed the little cafe curtain and stuck silver scrapbooking letters (H and C) onto to the faucet knobs.  I painted the faucet and arranged the items on the top of the table in a configuration that pleased me.
Then Mike did the rest. 

He removed the drawer runners and drawer front. He cut the hole for the "sink" (but I traced the circle!).  He applied multiple coats of primer and paint to the inside and outside of the table (I said I'd do that...but then asked him to).  He attached all those items and hardware.  He even ran out at 10 p.m. to buy a magnet to hold the "oven door" closed the night before the celebration (while I made jello cupcakes cursing the crayon box idea).

In other words, this was the kind of team effort that reminds me why I like my husband so much.

Nightstand Play Kitchen

It took a while to find the right table, so to satisfy my excitement in that down time, I Googled.  The list of blogs that I visited in my research for this project would be a mile long, and I just didn't really keep track.  Sorry, fellow bloggers.

The tutorial that helped me most, though, is a very detailed step-by-step series on Out of the Crayon Box. The most useful information that I took away was a supply list, particularly the wooden "J" for the faucet and a cake pan for the sink. 

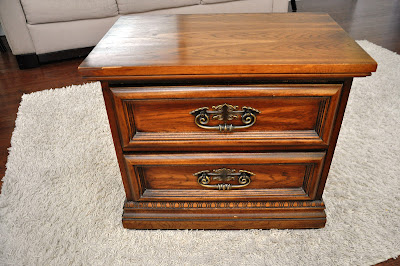
Here's the table I finally found at our local Salvation Army after visiting it once or twice a week for a several weeks.
Nightstand Play Kitchen

I saw a lot of these kitchens that look like contemporary grown-up ones with white, black, or stained wood and real faucets. I even saw one with a faux granite countertop. I, however, wanted a more vintage look and intended to paint ours--I mean, theirs--red. 

Nightstand Play Kitchen

Knowing this kitchen would live in the yellow, green, brown, and white playroom, it was up to the fabric to make that red work.  I was thrilled to find one in just those colors, with little apples on it no less.  Teachers dig apples, and so do toddlers.

Nightstand Play Kitchen
I do wish brown wasn't the dominant color as it doesn't look great with the red.  If it bugs me enough, that's a pretty simple fix.  Heck, knowing me, I might "redecorate" the kitchen just for fun one day.

Nightstand Play Kitchen

We just happened to have a whole bunch of matching white knobs on hand.  I chose to use those letter stickers instead of painting the knobs just in case we ever want to use them once again as The Land of Nod intended.

While 99% of this project comes from the ideas of creative others, the sunshines-turned-burners was an idea of my own.   Most suggestions I saw were for electric-style burners, and I prefer gas, even for pretend apparently.  As I wandered the craft store aisles in search of something cheap that wouldn't require much magic to turn into a gas burner, I spotted those firey suns. 

Nightstand Play Kitchen

I'm not a huge fan of those big plastic play kitchens and tables and club houses and whatnot.  The kids enjoy plenty of those on their child care center's playground, and I just don't like the look of them enough to bring any into our place.  I'm not saying it will never happen.  I'm just trying to avoid it.  This nightstand play kitchen project helped me do just that while repurposing furniture, knobs, and hardware.  Maybe that green effort will ease my conscience a bit about all those disposable diapers. 

Nope, it didn't.  Sorry, fellow earthlings.

Monday, January 30, 2012

Crayon Valentines

When working at a child care center years ago, I saw piles of broken Crayola stubs enter an oven and come out melted into Reese's Peanut Butter Cup-shaped Clowny-style crayons. (Remember Clowny?) I put crayon valentines on my future mommy to-do list. Enter Pinterest, and I couldn't resist making valentines for two-year-olds this weekend.

This Whipper Berry post is what twisted my arm.  I didn't die cut or letterpress anything, but here's what I did do.

I opted for Target instead of Michael's because their aisles are better suited for a double stroller.

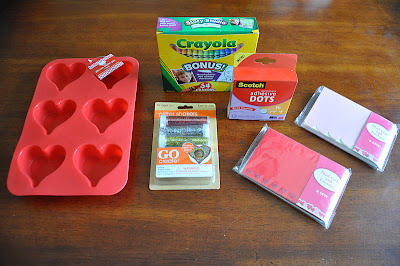
I picked up a silicone heart-shaped muffin pan ($2.50), blank valentine cards with envelopes (2 packs of 8/$1), glue dots ($4), a box of 64 crayons ($2.50), and some glitter ($1). 

Surely I could have picked up a nice box of themey valentines like the ones I gave out as a kid instead.  I could have even more easily done nothing this year and nobody would care.  However, I chose to get crafty.


Crayon Valentines

While the kids ate lunch I divided the crayons into groups of three, keeping complementary colors in mind with the intention of contrast. 

I peeled and peeled and peeled crayons throughout the day when I found a moment here or there.  Cutting the paper lenghtwise with a knife was very helpful but also felt like a lost fingertip waiting to happen. 

I heated the oven to 300 degrees, shook a thin layer of glitter into each heart shape, put broken pieces of three crayons in each, and baked them for 15 minutes with the silicone pan on a metal cookie sheet for stability. After cooling in the pan for about twenty minutes, the heart-shaped crayons came out very easily.

Crayon Valentines

The glue dots felt like a bit of a splurge, but I can't think of anything that could have adhered the hearts to the cards faster, more easily, or more neatly while also allowing the crayons to be removed with as little fuss.  I'm sure I'll get my money's worth with future crafts. 
Crayon Valentines

I considered typing and printing the sentiment since my handwriting looks like this:

Crayon Valentines

but I went for the handwritten touch.  I'm sure the toddlers in Michael and Sophie's class at the child care center will appreciate the charm as well as the overall hard work I put into these. :P

I'm probably a horrible twin mama for sending these crayon valentines from both Michael and Sophie rather than giving out cards from them as individuals, but that day will come.  I recently saw a Goldfish cracker fall out of Sophie's mouth and Michael eat it without missing a beat.  Individuality just isn't a big issue yet.

However, if they get valentines from their classmates written out to the two of them rather than ones of their own....no, actually, we really just don't care.  Not yet, anyway.

Sunday, January 8, 2012

Bath Toy Drying Solution

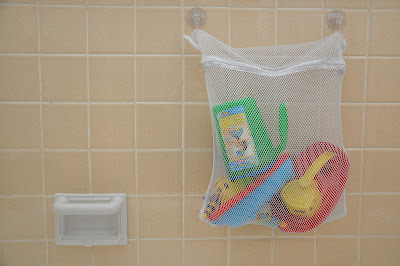
I saw this bath toy bag tutorial from Make It and Love It on Pinterest the other day and loved the look of it as a bath toy drying solution.  However, instead of going to a fabric store, buying mesh and ribbon, possibly going to another store to buy suction cup hooks, and later spending precious nap time sewing the thing, I went to my basement. 

Bath Toy Drying Solution

I had two mesh laundry bags for delicates (now I only have one) and a few leftover suction cup hooks in a package (that's how I hang my bath poof).  If I hadn't had the supplies on hand, I suspect one could find them at a dollar store for a whopping $2 investment, far less money than baby store bath toy bags and less time/effort than the DIY version. 

Whatever the cost, it's worth it to have a bath toy drying solution and a tub ledge free of boats!